
DIY IRL Livestream Backpack
Building a Cost-Efficient IRL Livestream Backpack
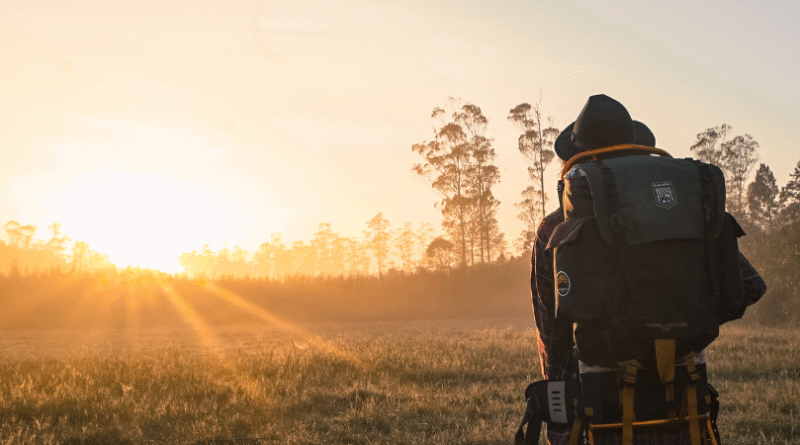
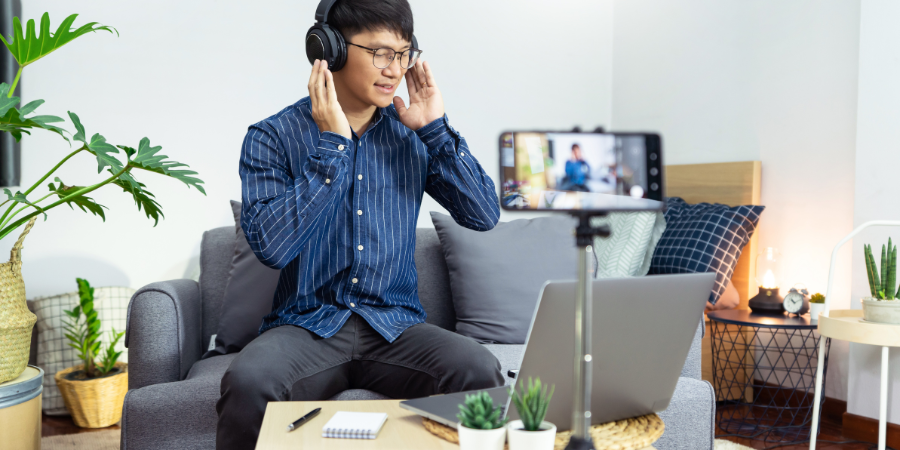
IRL Livestream Backpack “in real life” (IRL) means broadcasting video on the go – whether you’re walking through a city, hiking a trail, or attending an event. To stream high-quality video from anywhere, many creators use an IRL livestream backpack: a portable setup that includes a camera, network equipment, power supply, and other gear, all carried in a backpack. Professional IRL streaming kits (like those used by top streamers or news crews) can be very expensive, but it’s absolutely possible to build your own cost-efficient version using consumer-grade components. This guide will explain how to assemble an IRL livestream backpack targeted at U.S. consumers, with a focus on keeping costs reasonable while maintaining a reliable stream. We’ll cover all the necessary components, how to put them together, where you might find them (at common U.S. retailers), and tips for optimizing performance. By the end, you should have a clear roadmap to build a mobile livestream setup that suits your budget and needs.
Table of Contents
Components Overview
Before diving into assembly, let’s outline all the key components you’ll need for a DIY livestream backpack. We will go into detail on each category in the sections that follow:
- Camera: A device to capture video (and audio) as you move. This could be your smartphone or a dedicated camera.
- Mobile Bonding Router / Internet Device: Equipment to provide a stable internet connection on the move, often by combining multiple cellular networks. This might be a small router or mini-computer with multiple cellular modems (or tethered phones).
- Power Source: A portable power solution (usually high-capacity battery packs) to run your camera, router, and other devices for hours.
- Backpack and Mounts: A sturdy backpack to hold all gear, plus any mounting accessories to attach the camera or organize equipment and cables.
- Cooling Mechanisms: Methods to prevent overheating of your electronics – for example, fans or ventilated cases – especially important during long streams or hot weather.
- Streaming Software: Apps or software to encode the video and send it to your streaming platform (Twitch, YouTube, etc.). Depending on your setup, this could be an app on your phone or software running on a mini PC/encoder.
- Cables and Accessories: All the connecting cables, adapters, and miscellaneous items (like a microphone or tripod, if needed) that tie the setup together.
Each of these components has affordable consumer-grade options. In the next sections, we’ll discuss how to choose suitable products for each category and how they all connect in the final build.
Camera Choices for IRL Streaming
The camera is one of the most important parts of your backpack – it’s literally the eyes of your stream. When aiming for cost-efficiency, you have a few practical options:
- Smartphone Camera: For many beginners, the simplest and most budget-friendly camera is a smartphone. Modern smartphones (e.g. recent iPhone or Android models) have excellent cameras capable of high-definition video. If you own a relatively recent phone, you already have a 1080p or even 4K-capable camera with stabilization and decent low-light performance. Using your phone as the streaming camera keeps things simple: it can capture video (and use its built-in microphone for audio), run a streaming app, and connect to the internet – all in one. Pros: You likely already have it; great video quality on high-end phones; easy to use. Cons: Phones can overheat when streaming for long periods, and using your main phone for streaming might drain its battery quickly or make it unavailable for other uses during the stream.
- Action Camera (GoPro or similar): An action camera is a small, rugged camera designed for hands-free recording. Models like the GoPro Hero series or DJI Osmo Action are popular for IRL streamers because they’re lightweight, can mount on a backpack or chest harness, and often have wide-angle lenses to capture more of the scene. Newer action cams even offer live-streaming modes (for example, GoPro can livestream via a companion app). Pros: Durable and stabilized video; wide field of view; separate device so you’re not using your personal phone camera. Cons: Additional cost (a decent action cam can be a few hundred dollars), and you’ll still need a way to encode and send its video to the internet (usually by tethering to a phone or connecting to a streaming device).
- Mirrorless or Compact Camera: Some advanced IRL backpack setups use a high-quality mirrorless camera or camcorder for the best image quality (great for low-light, zoom, etc.). For example, a compact mirrorless camera with HDMI output can provide broadcast-quality video. However, this route is less cost-efficient – the camera alone can cost hundreds to thousands of dollars, and you’ll need extra gear (like a video encoder or capture card to feed the camera’s output into your streaming setup). For a consumer-focused, budget build, a mirrorless camera is likely overkill, but it’s an upgrade path to keep in mind if you later decide you want top-notch video quality.
Which to choose for a budget build? If you’re cost-conscious, start with what you have. If you already own a good smartphone, that may be all you need for now. It’s perfectly feasible to stream with just a phone in your rig. If you want a separate camera and have some budget, an action camera is a strong choice for its convenience and durability. In either case, ensure the device can record in at least 720p or 1080p and that it has stabilization (to smooth out shaky movement).
Mounting the Camera: However you choose to capture video, consider how you will carry or mount the camera while streaming:
- If using a smartphone, you might mount it on a selfie stick or a small tripod that can be attached to your backpack strap. There are phone holder clips that strap to a backpack shoulder strap, keeping the phone at chest level for a “first-person” perspective.
- For an action camera, you can use a clip or mount on your backpack (some streamers use a shoulder mount or even a chest harness for a GoPro). Many action cams come with adhesive mounts or clips that can attach to straps.
- Make sure the mount is secure and that the camera is angled properly to capture the action without requiring you to hold it the whole time. A hands-free setup will make your streams much easier and steadier.
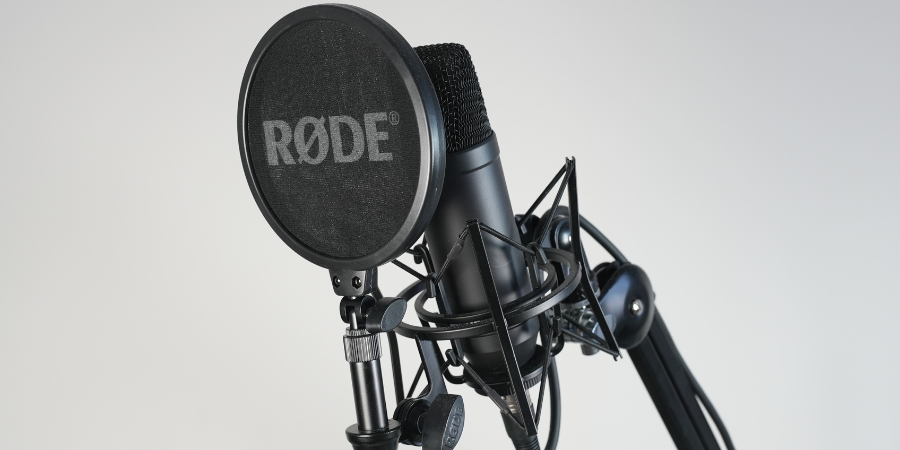
Audio Considerations: The built-in microphone on phones and action cameras will capture your voice and ambient sounds. In quiet environments, these mics are usually fine. But if you plan to stream in noisy places or want higher audio quality, you can add an external microphone. For instance, a small clip-on lapel (lavalier) mic can plug into your phone or camera (some action cams and phones need a 3.5mm adapter or use a mic that connects via Bluetooth or USB). A windscreen (a little foam or furry cover) on the mic is helpful outdoors to cut wind noise. External mics are optional in a basic build, but they are a relatively inexpensive upgrade ($20–$50 for many models) that can greatly improve your stream’s sound quality.
Mobile Bonding Router and Internet Connectivity
A reliable internet connection is the lifeline of any livestream. When you’re stationary at home, you might have a stable Wi-Fi or wired connection, but out in the world, you’ll depend on cellular networks. The challenge is that cellular coverage can be unpredictable – you might encounter dead zones or congested network conditions (especially in crowded events or remote areas). To tackle this, professional IRL backpack setups use network bonding: combining multiple cellular connections (often from different carriers) so that if one is weak, the others can help carry the stream, and overall bandwidth is increased.
For a consumer-friendly, cost-effective build, you have a few options to get internet on the go:
- Use a Single Mobile Hotspot or Phone Tethering: The simplest method (no bonding) is to use one device with a good cellular data plan. This could be your streaming phone itself using its 4G/5G data, or a dedicated mobile hotspot device (often called a MiFi) that you carry in your backpack. Many U.S. carriers (Verizon, AT&T, T-Mobile, etc.) sell portable hotspot devices and offer “unlimited” data plans (be mindful: some plans have speed caps or throttling after a certain amount of use). If you go this route, ensure you have a truly generous or uncapped data plan, because live video consumes a lot of data (streaming at 720p or 1080p for hours can use many gigabytes). Pros: Easiest setup (only one connection to manage). Cons: All your streaming depends on that single connection – if you hit a poor coverage area or the network slows down, your stream quality will drop or disconnect.
- Multiple Connections with Bonding (Recommended for Stability): For better reliability, you can combine two or more connections. For example, you might use two different smartphone SIMs from two carriers, or a phone plus a hotspot, or USB cellular adapters, all at once. To actually bond these connections (merge them into one data stream for your broadcast), you’ll need a mobile bonding router or equivalent device. Professional solutions include devices like the Peplink bonding routers or the LiveU Solo unit (more on LiveU later), but those can be expensive. A popular DIY approach is to use a small single-board computer (like a Raspberry Pi) or a travel router running special software to do bonding. One user-friendly bonding software is Speedify, which is an app/service that can combine multiple internet connections. Speedify can run on a Raspberry Pi (or even on a laptop or smartphone) and will aggregate, say, your Verizon and T-Mobile connections into one faster, more stable link.
Using a Raspberry Pi as a Bonding Router: To keep costs down, many DIY streamers use a Raspberry Pi (around $50-$70 for the board) as the brain of the network operation:
- Raspberry Pi 4 has enough processing power to handle multiple USB connections and run bonding software. It’s a tiny computer that fits in your hand. By installing Speedify (or similar) on the Pi, you can bond connections from several sources.
- Cellular Connections: You’ll need to feed internet to the Pi from more than one source. Common methods include:
- Tethering smartphones via USB: If you have an old phone (or a friend’s phone) with a data plan, you can connect it to the Pi with a USB cable and enable USB tethering. The phone then acts as a modem providing internet to the Pi.
- USB Cellular Dongles: These are USB sticks that take a SIM card and connect to cellular networks directly. They plug into the Pi’s USB port. (In the US, compatibility can be tricky; ensure any dongle supports the bands of your carrier. Popular brands include Huawei or generic 4G LTE sticks – you’d need an unlocked one and a data SIM).
- Dedicated Hotspot via USB or WiFi: A MiFi hotspot device can often connect via USB tether or you can have the Pi connect to it over WiFi. Some bonding setups have the Pi connect to one source via WiFi (e.g., Pi’s WiFi connects to a phone’s hotspot) while another source is via USB.
- Network Sharing: The Pi can combine those connections and then share the bonded internet out to your streaming device. If you’re using a smartphone as your camera/streaming device, the Pi can create a WiFi hotspot for your phone to use. Essentially, the phone will see a WiFi network (provided by the Pi) and connect to that, getting the benefit of the combined connectivity.
This kind of setup (Pi + Speedify + multiple modems/phones) has been demonstrated to be effective and much cheaper than buying a professional bonded encoder. Do note that Speedify is a subscription service (plans are around $5–$10 per month for individuals), but you can start with a free trial to test it. The Pi will also need a little software configuration (installing the OS and Speedify, setting up the network interfaces). While that’s beyond the scope of this high-level guide, there are many tutorials available, and the Speedify support site provides step-by-step guidance for Raspberry Pi bonding.
- Dedicated Bonding Hardware (Optional Upgrade): If you have a larger budget or plan to stream very frequently, you might consider devices like the LiveU Solo or Peplink bonding routers as an upgrade. For context, the LiveU Solo is a popular hardware encoder that accepts two USB modems and a WiFi/Ethernet, bonding them using LiveU’s cloud service. It’s highly reliable and built for streaming, but the unit costs around $1,000, and the bonding service (called LRT) typically has a monthly fee. Peplink (Pepwave) routers can bond connections and share via WiFi, and some models have slots for multiple SIM cards, but these routers can also run several hundred dollars depending on specs. For a cost-efficient build, these are not necessary, but they’re part of the “upgrade path” if you later decide to invest more for convenience or slightly better performance. Many community-built backpacks skip these in favor of the Raspberry Pi or similar DIY solutions to save money.
Summary for Internet: In this guide, we’ll assume a budget-conscious approach: using a Raspberry Pi as a bonding router with two or more cellular connections (for example, tethering two phones). If that’s too technical or you want to start simple, you can begin with just one connection (like a single phone or hotspot) and later add bonding. Just keep in mind your stream will be less resilient with only one network. The goal is to have redundancy – if one carrier has weak signal, another might still be strong, keeping your stream online. Many U.S. streamers use a combination of (for instance) Verizon and AT&T, or T-Mobile and Verizon, etc., to maximize coverage differences. You don’t necessarily need the fastest 5G on all connections; even a couple of 4G LTE connections bonded together can suffice for a 720p stream, as long as they are from reliable carriers.

Power Source: Batteries and Power Management
All this equipment needs power to run, and since you’ll be far from any wall outlets, you’ll rely on portable batteries. Power is often one of the heavier components in the backpack, because high-capacity batteries are a must for multi-hour streams.
Battery Packs (Power Banks): Choose one or multiple USB power banks that can provide sufficient voltage/current for your gear:
- Look for high-capacity packs measured in mAh (milliamp-hours). Common large packs are 20,000 mAh or even 30,000+ mAh. To translate, 20,000 mAh can typically charge a smartphone 4-5 times over or run a Raspberry Pi and a phone for several hours. The exact runtime depends on the power draw of your devices (the Pi, for example, might draw around 5V 1-2A when working hard, i.e., 5-10 watts; a phone might draw similar when screen is on and streaming).
- Output: Make sure the battery pack can output the required voltage and amperage for your devices. Most USB battery packs output 5V over USB-A or USB-C. Raspberry Pi runs on 5V via a USB-C port (for Pi 4), so that’s convenient – you can use a battery with a USB-C PD (Power Delivery) output for best results. Many newer power banks have a USB-C PD port that can supply 5V, 9V, 12V at different currents. For our purposes, 5V/3A (15W) output would comfortably run a Pi and maybe even a small USB hub with modems. Ensure your battery’s port can supply at least 2A at 5V on one port for the Pi or any device that draws similar power.
- Multiple Outputs: It’s useful to have a battery pack with more than one output port, or alternatively use two separate battery packs for different devices. For example, you might dedicate one battery to keep your camera/phone charged (via a USB cable to the phone), and another battery to power the Raspberry Pi and any USB devices. Some streamers color-code or label their cables and battery ports so they know what is powering what.
- Swapping and Capacity Planning: If you plan on streaming all day, consider carrying an extra battery or two. It might be better to have two medium-size batteries than one gigantic one, so that you can swap one out for charging while using the other. For instance, you could have two 20,000 mAh packs; use one until it’s low, then switch to the other. If you have access to charging (say you stop at a café or your car between segments), you can top them up. Some power banks even allow pass-through charging (charging the bank while it powers devices), but that’s less critical in the field.
Powering the Devices:
- Smartphone/Camera: If using your phone as the streaming camera, it’s wise to keep it plugged into a battery during the stream. Streaming video uses a lot of battery; even a big phone might only last 1-2 hours on its internal battery when streaming at full blast. A lightweight, short USB cable can connect your phone to the power bank in your bag. Make sure the cable is long enough to reach from the bag (or wherever the battery sits) to the phone mount on your shoulder/strap, but not so long that there’s a ton of slack getting tangled. A roughly 3 to 6-foot cable is often sufficient depending on routing. Using a right-angle USB connector or a cable with a 90-degree plug can reduce strain if the phone is mounted (so the cable doesn’t stick straight out).
- Raspberry Pi / Router: The Pi will likely run off a USB cable too (USB-C for Pi 4). Some batteries have a dedicated 5V/3A output port ideal for this. Alternatively, if using a different router or device that needs 12V (for example, some advanced routers or the LiveU have their own power input requirements), you might need a special battery or adapter. For our Pi-based build, a standard USB power bank is fine. Don’t forget to also power any USB hub or peripherals if needed – some USB modems or multiple devices might benefit from a powered USB hub. A small powered USB hub can itself be powered by the battery as well (some hubs accept a micro USB or USB-C for power input).
- Accessories: If you use an action camera, those usually have their own small batteries. You might carry a couple of spare GoPro batteries, for instance, and swap them during breaks. Alternatively, some action cams can be powered or charged via USB while in use (though weather-sealing might be compromised if you open the port door). For simplicity, many streamers just rely on the camera’s internal battery and swap it when low. Similarly, if you have a microphone that uses battery or wireless mic, ensure those are charged.
Estimating Battery Life: Let’s say your stream uses a phone and a Pi. If the phone draws about 5W while streaming and the Pi with modems draws maybe 5-7W, that’s roughly 10-12 watts total. A 20,000 mAh 5V battery pack has roughly 100 Wh (watt-hours) of energy (since 5V * 20,000 mAh = 100,000 mWh, or 100 Wh). At 10 W usage, that might run about 10 hours (100 Wh / 10 W = 10 hours) in an ideal scenario. In practice, some energy is lost in conversion and devices might spike higher at times, so maybe it runs 6-8 hours safely. This is a rough estimate – actual results vary, but it helps to figure out how many batteries you need. If you plan to stream a few hours at a time, one good power bank could suffice; for full-day usage, have more on hand.
Where to Buy: High-capacity power banks are widely available at consumer electronics stores. You can check places like Best Buy, which carries brands like Anker, Mophie, or Insignia, or online retailers like Amazon USA for a huge selection (Anker, RAVPower, and Goal Zero are popular brands in the streaming community). Camera specialty stores such as B&H Photo Video also sell professional battery packs, but those might be geared towards camera gear (some streamers even use DSLR “power bank” solutions or v-mount batteries, but those tend to be expensive; a normal USB power bank is more cost-effective).
Charging the Batteries: Don’t forget you’ll need to recharge these packs after each use. A wall charger that can fast-charge your power bank is handy (if the bank supports quick recharging via USB-C PD, get a compatible PD wall plug so you can refill that 20,000 mAh in a few hours overnight). And always charge up everything before heading out to stream!
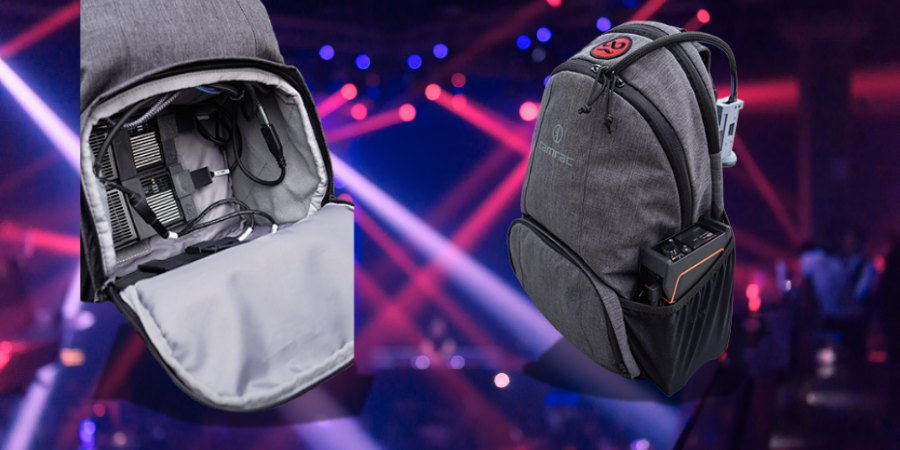
The Backpack and Mounting Gear
All your equipment will live inside (or attached to) a backpack while you stream. Choosing the right backpack and organizing your gear inside it is important for comfort, safety of your equipment, and ease of use.
Backpack Selection: For a DIY streaming rig, you don’t need a special-purpose bag; many streamers use a standard daypack or camera backpack. Here are some considerations:
- Size: You’ll need space for the battery packs, the Raspberry Pi or router, perhaps a USB hub and multiple cables, maybe spare camera batteries, etc. A compact backpack (something in the 15–25 liter range) is usually sufficient. It should not be too bulky – remember you’ll be wearing it for potentially hours while walking. A slim profile is nice so you can move through crowds without bumping people, yet it must hold your essentials. A commonly mentioned bag in the community is a standard school backpack or a small hiking daypack. For example, a Jansport or North Face daypack can work. There are also those cross-body sling bags which some streamers use for very minimal setups, but for our multiple-component build, a small backpack is more practical.
- Compartments and Padding: If you have a camera with you (especially if it’s a nice camera or if you’ll sometimes stow your action cam inside), padding helps. Camera backpacks (like those from Lowepro, Peak Design, etc.) have padded dividers which can be nice for organizing. However, they can be pricey. An affordable alternative: use any backpack and add your own padding or organizers. You can repurpose a padded laptop sleeve to protect your electronics or use soft cloth pouches for cameras. Also, consider a pack with a laptop compartment – that can hold a flat item like a tablet or even your Pi securely.
- Accessibility: You may need to reach into the bag during streaming (for instance, to swap a battery or adjust a connection). A bag with a side zipper or a clamshell opening makes it easier to quickly get to your gear. Some streamers set up their backpack so that all core components are on a single insert they can pull out or access by unzipping one panel.
- Durability and Comfort: You’ll be carrying some weight (batteries especially). A backpack with good shoulder straps and possibly a chest or waist strap can distribute weight more comfortably if your setup is heavy. Also ensure the bag is sturdy enough for daily use and perhaps somewhat weather-resistant. A water-resistant or waterproof material is a bonus – if you get caught in light rain, you want some protection (you can also pack a rain cover or simply a large ziplock bag inside to put around electronics in a pinch).
Organizing Inside the Bag: A bunch of loose gadgets and cables can quickly become a tangled mess. Good cable management and secure placement of devices will make your life easier:
- Consider using a rigid organizer board or velcro straps to mount devices. One popular method is a product called a GRID-IT organizer – basically a flat board with elastic straps crisscrossing, which can hold small items in place. You can strap down the Raspberry Pi, the battery, and even USB modems to such a board, then slide it into the backpack. This keeps things from shifting around.
- Velcro and zip-ties: Velcro cable ties are your friend. After connecting all your cables, bundle excess length with velcro straps so wires stay neat and close to the form of the bag. This reduces the risk of snagging and makes the pack neater. For a more permanent setup, you can use zip ties as well, but velcro gives you easy reusability if you need to reconfigure.
- Placement: Put heavier items like batteries towards the bottom of the backpack or close to your back for better weight distribution. Electronics that run hot (like the Pi or modems) might be better in a pocket that has some space or airflow around it (more on cooling soon). If your bag has mesh side pockets (for water bottles), some streamers actually stick a USB modem or hotspot there to keep it cooler and away from other electronics.
- If you anticipate swapping batteries or SIM cards or anything mid-stream, keep those accessible. For example, have the spare battery in an outer pocket so you can quickly open a zipper and grab it, rather than digging deep.
Mounting the Camera to the Backpack: We touched on this in the camera section, but to reiterate specifics:
- A common mounting solution for an action cam or phone is a backpack shoulder strap mount. There are accessories (for example, a clamp or clip mount) that attach to the strap near your shoulder, giving a stable platform for a camera. This yields a perspective similar to what you see in first person.
- Another option is a chest harness (like those used for GoPros), which straps around your chest. This isn’t attached to the backpack itself, but if you already have shoulder straps on, a chesty can fit over or under them. This gives an even lower perspective (from the middle of your chest) and can be very immersive. It’s really personal preference and what you find comfortable.
- For a smartphone, look for a phone clamp that has a standard tripod screw or GoPro-compatible mount. Many phone mounts can screw onto a small ball-head or clamp that then attaches to the backpack strap.
- If you want the flexibility to also put the camera down or hold it out occasionally, you could use a selfie stick or mini tripod that collapses. Some streamers carry a small selfie stick that can be quickly attached or detached. For example, you might keep the phone on a short handheld grip most of the time, but when you need both hands free, you slot that grip into a holster or pocket.
US Stores for Backpacks and Accessories: You can find a suitable backpack at general stores like Target or Walmart (they have basic laptop backpacks or daypacks), outdoor stores like REI (they carry day hiking backpacks with hydration bladder compartments that can double as cable routing channels), or Best Buy (which often has camera bags or laptop bags). For mounts and small accessories, look at Amazon or specialty camera stores. For example, B&H or Adorama (another camera retailer) have sections for GoPro accessories, chest mounts, tripod adapters, etc. Even stores like Best Buy have a GoPro accessory aisle. These mounts are usually not very expensive – a basic backpack strap mount or chest mount often costs around $15-$30.
Cooling and Heat Dissipation
One aspect that new IRL streamers sometimes overlook is heat. When you pack active electronics in a confined space (a backpack), they can get warm – especially during summer weather or long streaming sessions. Overheating can cause devices to throttle performance or even shut down, which could end your stream abruptly. So, it’s worth taking some steps to keep your gear cool.
Heat Sources in the Backpack: The main culprits for heat will likely be the streaming device (phone or mini-computer), the cellular modems/phones, and to a lesser extent the battery (batteries can warm up when discharging fast, though high-quality batteries manage heat well). If you’re using a smartphone as the camera and streamer, note that phones are notorious for overheating when streaming or recording video continuously, especially if they are also charging at the same time. Likewise, a Raspberry Pi running at high CPU usage (for bonding or encoding) can get hot, and cellular radios (USB dongles or tethered phones) will heat up under heavy data use.
Cooling Solutions:
- Ventilation in the Bag: Try not to pack all devices tightly against each other. If your backpack has some mesh or ventilation channels (some bags have “breathable” back panels), consider positioning heat-generating devices near those areas. You might even leave a zipper slightly open or use a mesh pocket for modems to allow air exchange. Obviously be cautious about weather (don’t expose devices to rain or dirt), but a bit of airflow helps. Some DIY builders have actually cut small holes in the side of an old backpack and mounted small fans there to act as intake/exhaust vents! While that level of mod is optional, it shows how far one can go – a couple of USB-powered fans in the bag can actively pull in cooler air and push out hot air.
- Fans and Heat Sinks: For the Raspberry Pi, it’s highly recommended to use a case that includes a fan or heat sink. There are affordable Raspberry Pi 4 cases with built-in tiny fans that run on 5V from the Pi’s GPIO pins. These can dramatically reduce the Pi’s CPU temperature. They do make a slight noise, but inside a backpack it’s hardly noticeable (and won’t be picked up much on mic, if at all). If you have USB modems, note that they can become quite hot to the touch after a while; spacing them out or even sticking little heat sink fins on them can help dissipate heat.
- Avoid Direct Sunlight: If your camera/phone is exposed (like on your shoulder mount) on a hot sunny day, it can overheat quickly. Try to keep the device out of direct sun if possible – maybe mount it in a way that shades it slightly or simply be mindful to take breaks in the shade. Also, high screen brightness contributes to heat on phones; consider dimming your screen or turning it off when you don’t need to monitor it (some apps allow you to stream with screen off to save power and heat).
- External Phone Coolers: There are phone cooling accessories on the market – for example, small clip-on fans or even cooling plates (some have a Peltier cooler and a fan). These are popular with mobile gamers to keep phones cool. They clamp onto the back of the phone and actively cool it. If you find your phone is a major bottleneck due to overheating, one of these could be a solution. They usually cost around $20-$40. Just ensure it can still fit with your mounting setup if you use one.
- Spacing: Inside the pack, use separators so that hot devices don’t heat each other up. For instance, don’t sandwich your tethered phone and the Pi together; perhaps have them on opposite sides of a divider or with a bit of foam with airflow gap.
- Monitoring: It’s a good idea to occasionally feel the temperature of your devices during a test stream. If something is uncomfortably hot to touch, you need to cool it better. Some apps and the Raspberry Pi allow you to monitor internal temperature. As a rule of thumb, smartphones often start throttling above ~40°C battery temp, and Raspberry Pi will thermally throttle at 80°C CPU temp. We want to stay well below those.
Cold Weather Note: Though less common than overheating, extreme cold can also be an issue (batteries drain faster in cold, and devices can shut off if too cold). In winter, keep batteries closer to your body or insulated. But generally, heat is the more frequent concern.
Streaming Software and Configuration
With hardware in place and internet connectivity sorted out, you need software to actually broadcast your video to the world. The exact software (or app) will depend on whether you are using a phone to stream or a separate encoder.
Smartphone-based Streaming: If your camera and streaming device is a smartphone, the good news is there are many mobile apps designed for live streaming:
- Native Apps (Twitch/YouTube/etc.): The simplest route is to use the official app of the platform you want to stream on. For example, the Twitch mobile app has a “Go Live” feature that lets you stream directly from your phone’s camera to your channel. Similarly, YouTube’s app (if your account is verified for mobile live streaming) can broadcast live video. These are easy to use but offer limited control (you usually can’t add overlays, and you have minimal settings for bitrate or resolution).
- Dedicated Streaming Apps: For more features, consider apps like Streamlabs Mobile, Prism Live Studio, or Larix Broadcaster:
- Streamlabs (available on iOS and Android) is user-friendly and allows some customization like adding overlay widgets, alerts, and switching scenes. It integrates with platforms like Twitch, YouTube, and Facebook.
- Prism Live Studio is another free app that supports multi-streaming (if you want to go to multiple platforms) and overlay features. It’s known for a clean interface and is also on both major mobile platforms.
- Larix Broadcaster is a more bare-bones but powerful app that allows you to stream to a custom RTMP server and gives fine control over encoding settings (bitrate, resolution, etc.). It’s great if you are more technical or want to use your own ingest server.
- IRLTV/IRL Chat and others: There are some community-developed apps specifically for IRL streamers. For example, “IRLTV” on Android was designed to work with a cloud overlay service (and used in conjunction with things like the Gunrun backpack setup). Another is IRLPro (for Android), an open-source app that some IRL streamers use to bond connections on the phone. Explore and choose what fits your comfort level.
- Settings: Whichever app you choose, you’ll need to configure the stream quality. A safe starting point for a stable stream on mixed networks is 720p resolution at 30fps, with a bitrate around 2500-3000 kbps (kilobits per second). This is a fairly modest HD stream that should work on two average 4G connections bonded, or a decent single 4G/5G connection, without too much risk of buffering. If you know your network conditions are excellent, you can try 1080p or 60fps or higher bitrates (many go to 6000 kbps or more for 1080p), but keep in mind higher settings = more data usage and more strain on gear (the phone will work harder encoding 1080p60 than 720p30, generating more heat). It’s best to test and find what your setup can handle reliably.
- Stream Key and Platforms: For direct-to-platform apps (like Twitch app, Streamlabs with YouTube account linked, etc.), you just log in and go live. For more manual apps like Larix where you need a server URL and stream key, you’ll get those from your streaming platform’s dashboard (e.g., Twitch has a primary stream key, and a URL like
rtmp://live.twitch.tv/app/…). Always double-check you have the right key before going live to avoid streaming to the wrong channel or not connecting at all.
Using a Separate Encoder (Laptop/Pi): In some setups, especially if you decided to use a mini PC or the Raspberry Pi to handle the streaming (encoding the video), you might run traditional streaming software on that device:
- On a Raspberry Pi, running a full OBS Studio for high-quality streaming can be challenging due to limited CPU/GPU. It’s generally recommended (as per many DIY guides) to offload encoding to the smartphone or use a lightweight method like FFmpeg on the Pi. For instance, advanced users might set up the Pi to capture a camera feed and push it via FFmpeg to the RTMP server. However, this is complex and not necessary for most – especially given we’re focusing on consumer-friendliness.
- If you carry a small Windows laptop or tablet (like a Microsoft Surface Pro, which some streamers have used) in the backpack, you could run OBS Studio or Streamlabs OBS on it, just like you would on a desktop. The laptop would take video input (maybe from a webcam or HDMI capture of a camera) and use its CPU/GPU to encode. This gives maximum flexibility (all the overlay and scene control of OBS), but comes at the cost of weight, power consumption, and complexity. It’s an option, but not exactly a cost saving option unless you already have the device and really want to use it.
Summary: For our cost-effective build, using your smartphone with a good streaming app is the straightforward choice. We will assume the phone is doing the encoding and sending out the stream, while the Raspberry Pi provides the bonded internet connection to the phone (the phone sees it as Wi-Fi). This way, the Pi doesn’t have to do heavy video processing – it just ensures you have internet stability, and the phone (which has a hardware encoder for video) handles the streaming.
Be sure to do trial runs at home or nearby to get comfortable with the app interface – know how to start/stop the stream, how to read chat (some apps like Streamlabs let you overlay chat on your screen), and how to adjust settings if needed.
Assembly and Connections: Step-by-Step Guide
Now that we have all components and background covered, let’s walk through how to assemble and connect everything into a working mobile livestream setup. We will describe the process for a typical setup where:
- A smartphone is the camera/streaming device.
- A Raspberry Pi (with Speedify) is bonding two cellular connections and providing Wi-Fi to the phone.
- Power banks supply power to both Pi and phone.
- All of this is organized in a backpack.
Step 1: Prepare the Raspberry Pi (Bonding Router)
Before you put it in the backpack, it’s easier to set up the Raspberry Pi software at a desk:
- Install the Raspberry Pi OS on a microSD card and boot up the Pi. Connect it to a monitor/keyboard or access it via remote (SSH) for initial setup.
- Install Speedify (or your chosen bonding software) on the Pi. Create a Speedify account if you need (you can start with a trial or basic plan).
- Connect your chosen internet sources to the Pi. For example, plug in Phone A via USB and enable tethering on that phone (the phone may show up as an interface like
usb0on the Pi). Plug in Phone B or a USB modem similarly. If one connection is via Wi-Fi (say the Pi’s built-in Wi-Fi connecting to a hotspot), set that up as well. In Speedify, you should see multiple internet connections available to bond. - Configure Speedify bonding. Usually, it’s straightforward: the software will detect the connections and start using them in combination. You might want to set it to start on boot for convenience.
- Set up the Pi to share the bonded connection via Wi-Fi. This involves enabling a Wi-Fi hotspot (access point mode) on the Pi. Essentially, the Pi becomes a router: it takes the bonded internet and redistributes it. You can do this by editing network settings or using tools like
hostapdon Linux. Choose an SSID (network name) and password for your backpack Wi-Fi. For example, call it “IRLBackpackNet” for identification. - Test this at home: connect a laptop or your phone to the Pi’s new Wi-Fi network and see if you can browse the internet. If Speedify is bonding properly, disconnect one of the internet sources and verify that you still have a connection (to simulate one network dropping). This testing ensures your bonding router is working reliably before you rely on it outdoors.
(This software setup may sound a bit technical, but it’s largely a one-time process. Many guides online can help with “Raspberry Pi Wi-Fi hotspot” and “Speedify on Raspberry Pi.” Once configured, you won’t need to constantly tinker with it – it should run on boot and just work in the background.)
Step 2: Arrange Components in the Backpack
Now, gather the hardware in the backpack:
- Place the battery pack(s) in their intended spot. If using one main battery for everything, put it in a secure pocket or towards the bottom. If using multiple, decide which will power what.
- Mount the Raspberry Pi. If you have a case for it (especially one with a fan), that’s ideal. Ensure the fan is plugged into the Pi’s GPIO power pins or otherwise powered. You might strap the Pi to a board or side of the backpack using Velcro or the elastic organizer. It should be held firmly so it doesn’t jostle. Also consider orientation: if the Pi has vents or the fan blows, give it some space.
- Connect the power to the Pi: Run a USB cable from the power bank to the Pi’s power input (USB-C port on Pi 4). Don’t turn it on just yet or, if the battery has a power switch, keep it off until ready.
- Attach the USB cellular devices: Plug in your USB modems or tethered phones to the Pi (likely via a USB hub if you need more ports or if you want to avoid drawing too much power from the Pi’s own ports – a powered hub can help, though for two phone tethers the Pi’s ports might suffice). Secure those devices too. For example, if you have a second phone acting as a hotspot/tether, you might keep it in a pocket or strap it down. If it’s plugged in, also connect it to a charging cable from the power bank (so that phone doesn’t die).
- For each phone or modem, manage the cables: USB cables can be taped or velcroed along the backpack’s interior so they aren’t loose. If using an external USB hub, secure the hub similarly.
- Double-check that all data cables and power cables are firmly connected but not bending at extreme angles. You want to avoid strain on ports, especially as you move.
- Set up the Wi-Fi antenna for the Pi (if your Pi case or setup uses an external Wi-Fi adapter or you have the internal one – ensure it’s not blocked by metal; the Pi 4’s internal Wi-Fi antenna is on the board, which should be fine for a few meters range to your phone).
- Put any additional accessories: spare batteries, camera batteries, cables, maybe a small toolkit (like a screwdriver or gaffer tape) for emergencies, inside the bag in their places.
Step 3: Mount/Prepare the Camera
- If using your smartphone as the camera, insert it into your chosen mount (clamp or harness). If you will need the phone to also control some things initially (like starting the app, checking chat), you might leave it handheld until you go live, then mount it – or mount it and use another phone to monitor chat if you have that luxury. Plan how you’ll interact with the phone’s screen when it’s mounted (sometimes it’s awkward on a chest mount to tap things). A workaround: you could start the stream while holding the phone, then attach it to the backpack mount once it’s rolling.
- Connect the charging cable from the power bank to your phone. A tip: route the cable along the strap of the backpack and secure it with a couple of Velcro ties or clips. Leave a little slack near the phone mount so you can move the phone if needed, but not so much that it dangles freely. If the cable is excessively long, coil it and tie off the excess inside the bag or along the strap.
- If using an action camera, mount it similarly (to strap or harness). If that camera is feeding into your streaming device (like a Pi with capture card or a laptop), connect that cable (e.g., HDMI to a capture card on the Pi or USB). Ensure the camera’s battery is charged or it’s connected to a small USB power feed as well if you plan to power it. Action cams typically can output HDMI for an encoder or stream via a phone app – clarify which method you’re using. But for simplicity, assuming smartphone camera for now avoids needing an extra capture card.
Step 4: Power On and Connect
- Turn on the battery pack(s) and thus power up the Raspberry Pi (and any tethered phones or devices connected). The Pi will boot up. Give it a minute or two to start Speedify and the Wi-Fi hotspot.
- Turn on your phone’s Wi-Fi and connect to the Pi’s hotspot network (the SSID you configured). It should connect just like you would to any home Wi-Fi. Because this is likely an internet-sharing from the Pi, your phone will see it as an internet source (if you did everything correctly).
- (If using multiple phones or devices, make sure any that need to be tethered via USB are plugged in and have tethering enabled now. Also ensure their cellular data is on and they have signal. It’s a good idea to check signal strength of each – if one has no signal, you might reposition it or at least be aware one link is down.)
- On your streaming phone, once Wi-Fi is connected, you might want to disable its own cellular data temporarily to be sure all data goes through the bonded network. Actually, if your phone is also one of the tethered devices supplying the Pi, you wouldn’t connect that same phone to the Pi’s Wi-Fi (that scenario is if the phone itself was both a source and streaming device, which gets complicated – generally it’s better the streaming phone is not also one of the tethered modems, or if it is, you’d run Speedify on the phone directly. To avoid confusion: let’s assume the streaming phone uses only Wi-Fi to the Pi, and two other connections are feeding the Pi).
- Once the phone is on the Pi’s network, test that it has internet: open a browser or do a quick speed test. If all good, you’re ready to stream.
Step 5: Launch the Stream
- Open your chosen streaming app on the phone. Input your stream settings (resolution, bitrate, stream key or login as needed). It’s wise to start with a test – maybe stream to a private channel or unlisted YouTube stream to verify quality.
- Press the “Go Live” or start button. In your app, you should see the stream timer running or a status indicator. Check the bonded connection’s performance if possible – Speedify on Pi has a web dashboard (if you access it via Pi’s IP) showing throughput on each connection. Or simply monitor the stream health via the app’s stats (some show dropped frames or reconnection attempts).
- If everything is configured correctly, your live video is now being broadcast. The phone sends data over Wi-Fi to the Pi, which bonds across multiple cell networks, providing a more robust uplink for your stream.
- Mount the phone securely if you haven’t already. Make sure the lens is clean, the angle is good, and then get moving! You’re now live on the go.
Step 6: Monitor and Adjust
As you move around streaming, keep an eye (or ear) on a few things:
- The phone’s screen (if you left it on) can show chat or stream stats. Engaging with chat is one of the fun parts of IRL streaming; you may want an earbud in one ear with a text-to-speech of chat or alerts if looking at the screen is hard while walking. This depends on your preferences and the streaming platform capabilities (some use a second device to read chat).
- Cabling: ensure you’re not snagging your camera cable if you turn around or move. After a bit of walking, you’ll get used to the tether.
- Heat: feel the phone or the part of the bag where the Pi is occasionally to make sure things are not overheating early on.
- Battery levels: many stream apps won’t show your battery while you’re full-screen streaming. It’s good to check that your phone is indeed charging from the power bank (most phones have a small LED or symbol to indicate charging). Also check the power bank itself; some have indicator LEDs for charge remaining.
- If you notice any connection issues (e.g., viewers say the stream is buffering), you can stop and troubleshoot (see troubleshooting section below for tips). Sometimes just pausing in a spot with better signal or reconnecting a cable can fix an issue.
That covers the assembly and live operation. It may seem like a lot at first, but once set up, running an IRL backpack becomes a routine: charge up, plug everything in, power on, connect and go live. Next, we’ll discuss some tips to get the most out of this setup and how to address common problems.
Tips for Optimizing Performance
Building the backpack is half the battle; using it effectively is the other half. Here are some tips to optimize battery life, stream stability, heat management, and cable management in day-to-day use:
- Battery Life Optimization:
- Dim or turn off the phone screen when possible. The screen is a big power drain and heats source. If you’re comfortable with not always seeing chat, you can turn the screen off (some apps let you lock the screen while streaming continues). If you need the screen, consider lowering brightness to the minimum acceptable level.
- Close unnecessary apps on your phone and put it in Do Not Disturb mode during streams. Background processes can eat battery and CPU. Streaming apps should ideally be the only heavy app running.
- Use lower power settings on the Pi if available. For example, underclocking the Pi slightly or disabling its onboard Bluetooth, etc., might reduce power consumption a touch (though Speedify use might be the dominant factor). Only do such tweaks if you’re comfortable – they are optional.
- Bring spare power: It can’t be overstated – have more battery capacity than you think you need. If you expect to stream 4 hours, plan for 8 hours of battery. Unexpected delays or inefficiencies happen, and it’s better to end a stream by choice than have all power die mid-stream. Pocket-sized USB batteries can even act as emergency backups for the phone alone if needed.
- If you have multiple power banks, hot-swap them carefully. To swap a battery on the Pi/router, you might need a brief downtime unless you have a seamless way. One trick advanced users do is use two batteries and a diode OR-ing circuit or UPS hat for the Pi – but that’s beyond scope. Simpler: plan a quick break when swapping and stop the stream for a moment if necessary (or keep the stream going on phone’s internal battery while you quickly change the Pi’s supply, if the phone still has internet for that minute).
- Stream Stability and Network Tips:
- Monitor your bitrate and adjust on the fly if needed. If you go into an area with poor coverage on all networks (e.g., a basement or rural area), your bonded connection may still struggle. It can help to lower your stream bitrate via the app if you notice sustained issues. Some apps or services do this automatically (adaptive bitrate streaming), but many require manual adjustment.
- Use SIM cards from different carriers if possible. As mentioned, a diversity of networks (AT&T + Verizon, or Verizon + T-Mobile, etc.) gives a better chance at least one has decent signal at any location. It also avoids carrier-specific throttling if you split usage between them.
- Unlimited data plans: Ensure your data plans are truly unlimited or have a very high cap. Live video can easily consume 2-3 GB per hour at moderate quality. Some “unlimited” plans reduce video bandwidth or throttle after, say, 50 GB in a month. Look for carriers or plans that allow high usage. In the U.S., some providers offer “business” or “enterprise” data SIMs that are more expensive but less prone to throttling. For cost-efficiency, you might use regular consumer plans that are reasonably lenient. Just keep an eye on usage.
- If not using a bonding solution like Speedify, consider at least having a backup connection. For instance, if you stream just on one phone, carry a portable hotspot from another carrier as a backup. In a pinch, you can switch the phone’s Wi-Fi to that hotspot if its own data fails. It’s not seamless, but it can save a stream.
- Avoid areas with known wireless interference or extreme network congestion when possible. For example, huge events with tens of thousands of people can overwhelm all cellular networks, bonding or not. In such cases, manage viewer expectations that quality might dip. Sometimes streaming at lower quality or recording offline to upload later might be the only option in extremely congested scenarios.
- Heat Dissipation:
- As covered in cooling, be proactive. Use a fan in the backpack if you know it’s a hot day. On a sunny day, you might even put a small reflective sunshade on your phone (some streamers improvise little covers or use white-colored cases to reflect heat). If the phone overheats, you may see a warning on it or the video might stutter. If that happens, find a cooler spot, point a fan at it (even a handheld fan can help), or reduce workload (stop and let it cool).
- Keep vents clear. If you notice the Pi’s fan vent is pressed against fabric, reposition it so it has at least a small air gap.
- One simple trick: open the backpack briefly while you’re stationary to let it air out. Waving the pack or removing it for a minute can flush out hot air. This might look a bit funny on stream, but a quick “technical pit stop” is fine.
- Cable Management and Preventing Snags:
- Secure cables at multiple points. For example, the phone’s charging cable: maybe use a velcro strap at the top of the shoulder strap and another at the bottom to guide it in a clean line. This also provides strain relief – if you accidentally tug the cable, the force distributes to those anchor points rather than straight to the phone’s port or battery’s port.
- Keep cable length just enough for required movement. Any large loops of slack should be bundled and tied. You don’t want a loop of cable hanging that can catch on door handles or branches.
- Consider using cable protectors or right-angle adapters on sensitive ports. For instance, some cameras have fragile micro HDMI ports; people use small 90° adapters or locking connectors to avoid damaging them. On a phone, magnetic charging cables (those breakaway connectors) can save your phone’s port if someone yanks the cable – it’ll just disconnect magnetically. This is optional but can be a savior if you’re in a crowded space and someone trips on your cable.
- Label your cables and ports if you have a complex setup. It can reduce confusion when something needs to be re-plugged. Even a color tape or small tag saying “power to Pi” vs “power to phone” helps when feeling around in the bag.
By following these tips, you’ll extend the life of both your gear and your stream uptime. Many optimizations come with experience – after a few streams, you’ll identify which part of your setup is limiting you (be it battery, heat, or network) and you can tweak accordingly.
Troubleshooting Common Issues
No matter how well you plan, technical issues can occur. Here are some basic troubleshooting tips for common problems you might face with an IRL backpack setup:
- Stream Disconnects / Drops Frequently:
- Potential Causes: Network bonding could be failing or both cellular connections are weak. Or the streaming app might be crashing.
- Steps to Fix: First, check your phone – is the streaming app still running or did it crash? If crashed, restart it and resume the stream (some apps can reconnect to the same stream within a minute or two). If the app is fine, then likely it’s a network issue. Check the indicators: Speedify (if you can see it) might show if one connection dropped out. You could try pausing in one place to see if being stationary improves it (walking sometimes causes signal to fluctuate). If one of your modems has lost signal (e.g., no bars on one phone), consider restarting that tether or toggling airplane mode on that device to force reconnection. In worst case, you might temporarily stop bonding and use a single network – for example, if one SIM card is getting 0.5 Mbps and the other is 1 Mbps, Speedify might still struggle; turning one off might let the other just do its best without overhead. This is a last resort and usually bonding helps, but it’s something to try if bonding config itself went awry.
- Also, ensure your Speedify or bonding service subscription hasn’t lapsed or hit a limit (Speedify doesn’t really cap usage for paid plans, but if you were on a free trial it might).
- Overheating Shutdown:
- Symptoms: Phone shows an overheat warning or abruptly slows down video quality drastically. The Pi might freeze or reboot if it overheats (less common if cooled).
- Fix: Stop streaming and remove the heat source. Move to shade or a cooler environment if outside. Physically cooling the phone with airflow is helpful – point a fan or even wave the phone in the air. For the Pi, turn off the backpack and let it cool a few minutes. You might have to wait a bit before continuing. Use this downtime to hydrate and explain to your viewers (if any) what’s happening – most will understand. To prevent recurrence, try to figure out what overheated (phone vs. bag) and apply the cooling tips from earlier (e.g., lower bitrate, open bag, etc.). In some cases, you may have to end the stream early if it’s too hot to continue – safety of your devices is important, and you can plan to improve cooling for next time.
- Battery Dying Unexpectedly:
- Symptom: Suddenly your equipment loses power, stream dies, or devices turn off.
- Causes: You might have underestimated power usage, or a cable came loose and the device was running on its own small battery which eventually died.
- Fix: Check connections – is the power bank actually connected and turned on? Some power banks auto-shut-off if the current draw is very low (not likely here, but some Pi + phone combos might trickle if idle; ensure the bank knows to stay on). If a battery is empty, swap to a fresh one. If the phone died because maybe the charging cable wasn’t actually charging (common if cable was loose or not enough output), you may have to give it a quick charge before restarting. Having a portable charger (wall plug) could let you recharge stuff at a venue or store if you’re in a pinch. Ideally, monitor battery levels before they get critical – set alarms or check every hour.
- After a power-related shutdown, you’ll need to restart everything and resume the stream, possibly on a new stream URL if the previous one ended abruptly. Communicate with your audience via social media or a quick message if possible in such cases.
- Video or Audio Quality Issues:
- Blurry / pixelated video: likely due to low bitrate (network can’t support your set bitrate). Solution: lower your bitrate or resolution in the app settings. If it’s occasional, it might just be momentary poor coverage; if constant, you’ve set too high quality for your conditions.
- Audio desync or choppiness: Could be the app misbehaving or phone being overloaded. Sometimes stopping and restarting the stream fresh fixes sync issues. If using an external mic and noticing issues, check connections (a partially connected mic can cause crackling or only one channel audio). If wind noise is an issue, add a windscreen to the mic or use the phone’s built-in noise suppression if available.
- Camera issues: If the video feed freezes but stream is still live, the camera app might have crashed or the connection from camera to app (if external) failed. You may need to reinitialize it – e.g., unplug and replug a capture card or just restart the app. Planning for minimal points of failure (like using the phone camera directly rather than a complex external camera) reduces these occurrences.
- Cable Snag / Hardware Accident:
- Always be mindful of your physical surroundings. If something yanks on your gear (you trip over your own cable, or someone else tugs it), stop to inspect. Look for any damage to cables or ports. If a cable is damaged and you have a spare, switch to it to avoid intermittent disconnections. This is why carrying a few spare cables can save a stream.
- If the backpack falls or is treated roughly, double-check that the Pi is still running (SD cards can momentarily dislodge or power cables can pop out). A brief power cut might reboot your Pi – if so, you’ll have a short network outage until it’s back up. Having the Pi auto-run everything on boot mitigates the effect (it will come back online and your phone will reconnect).
- Cannot Connect to Pi’s Hotspot / No Internet on Phone:
- If you fire everything up and your phone isn’t getting internet, a number of things could be wrong. Troubleshoot systematically: Is the Pi on (power LEDs)? Are the phones tethered recognized (maybe the Pi didn’t establish one of the connections)? Is Speedify running? Perhaps the Pi’s Wi-Fi didn’t start the hotspot (this can happen if the Pi booted before Speedify bonds, depending on config). You might need to ssh into the Pi or connect a screen to see status. A quick fix if you suspect the Pi’s hotspot is the issue: reboot the Pi and/or toggle the phone’s Wi-Fi off and on. Also verify that the phone didn’t revert to using its own data (some phones auto-swap to cellular if the Wi-Fi has no internet).
- Always good to test the whole rig in a low-stakes environment (like at home or around the block) before doing a big stream in a far location. That way you can catch these issues.
General Troubleshooting Advice: When something goes wrong, try to isolate the problem. Is it the camera, the network, or the power? By systematically checking each subsystem (camera/app, network connection, power supply), you can usually pinpoint the culprit and apply the fix or workaround. Over time, you’ll develop an intuition for “oh, the video is choppy, probably the network” or “the device feels hot, likely about to throttle.” Keeping calm and communicating with your audience (“hey folks, quick tech issue, give me a minute”) also helps – most viewers are supportive if you keep them in the loop.
Upgrade Paths and Future Improvements
One of the great things about building your own IRL backpack is that it’s modular – you can upgrade components as your needs grow or budget allows. Here are some upgrade paths and enhancements you might consider down the road:
- Camera Upgrade: If you started with a smartphone or basic action cam and you find yourself wanting better image quality, consider upgrading to a dedicated camera. For example, some streamers move to a mirrorless camera (like a Sony Alpha series or Panasonic GH series) for superior video. These cameras can output clean HDMI video. To integrate that, you’ll need an HDMI encoder or capture device. One approach is to get an HDMI hardware encoder that can stream directly (some products exist that take HDMI and output an RTMP stream via a network connection). Another is to use something like a LiveU Solo which is purpose-built for taking an HDMI feed and bonding networks to stream it. This is a bigger investment, but yields top-notch video and often better low-light performance and zoom capability.
- A middle-ground upgrade is to use a better action cam or 360 cam. Newer GoPros or similar devices keep improving image stabilization and resolution. There are also 360° cameras (like the Insta360 series) which some IRL streamers use to allow viewers to look around (though streaming 360 video interactive is a bit niche and bandwidth-heavy).
- If you go with a real camera and a separate encoder, you might also upgrade audio by using an external microphone (like a shotgun mic on the camera or a wireless lavalier mic on yourself) for even clearer sound. Pro-level IRL setups often have such audio gear.
- Network Upgrade: As technology advances, you might incorporate 5G modems for increased bandwidth. There are USB 5G adapters and dedicated 5G hotspots now. While 5G can provide much higher speeds and lower latency in ideal conditions, keep in mind its range limitations; in some areas 4G LTE might still be more consistent. Still, adding a 5G connection (for example, using a 5G phone tethered or a Verizon 5G hotspot) could allow you to stream at higher bitrates or 1080p with more confidence.
- Another upgrade path is using a professional bonding service. For instance, if you ended up buying a LiveU unit, you’d use LiveU’s LRT service which is robust. Or Peplink’s SpeedFusion Cloud for bonding across their routers. However, these services usually have monthly fees that add up. For a hobbyist or part-time streamer, the DIY bonding (Speedify or similar) is more cost-effective.
- More SIMs: You could go from two connections to three or four if you find you need even more reliability. This would require USB hubs and perhaps careful power budgeting, but Speedify can handle many connections. Just ensure you diversify carriers or use some that have truly independent towers (two SIMs on the same carrier often won’t help much unless one has a different coverage or plan).
- Stability and Automation: As you refine your setup, you might script or automate certain things. For example, setting the Pi to automatically reconnect specific devices, auto-start the stream when everything powers on (some people script their OBS or use apps that auto stream on boot). There are also community projects (like IRL Toolkit and Bella streaming software) which aim to streamline the management of IRL backpack streams (providing remote control, better reconnection logic, etc.). Investigating these tools can elevate your streaming experience.
- You could add a small status screen or LED indicators to your backpack that show things like connection status or battery levels at a glance. This can be done with Arduino or Raspberry Pi add-ons, for the tinkerers out there.
- Power Enhancements: If you find swapping USB power banks tiresome or limiting, consider using higher-end battery systems. Professional setups use broadcast camera batteries (like V-mount or Gold-mount batteries), which are heavy but have huge capacity and secure connectors. They also can output at various voltages for different gear. There are adapter plates that let you use a V-mount battery to feed USB outputs, etc. While overkill for many, if you start running an involved rig with multiple devices drawing power, a single big battery might be more convenient than juggling many USB packs. Just note the cost – those batteries and chargers can be a few hundred dollars.
- Also, solar chargers or power banks with solar panels could be interesting if you stream in very remote areas and need to recharge in the field (though solar is slow and only really good during downtime in sunlight).
- Backpack and Comfort: Upgrading your backpack for better comfort is a quality-of-life improvement. If your current bag strains your shoulders, you might invest in a more ergonomic backpack, maybe one with better ventilation (some hiking packs have a mesh back that allows air between you and the pack – great for not getting too sweaty and could aid cooling). Some newer IRL backpack offerings (like the ones sold by streaming gear companies) have custom compartments and cable routing features – you can draw inspiration from those designs to modify your own.
- You might also add a battery-powered LED light to your rig for night streaming, attached to the backpack or camera, if you plan to stream in darkness and want viewers to still see you/scene.
In summary, the basic setup we outlined can always be improved in durability, quality, and convenience, but each step up often comes with significant cost. The beauty of a cost-efficient build is you start with something affordable and functional. As you gain experience, you’ll know exactly where to invest your next dollars for the most benefit to your stream. Many streamers gradually build up their rig over time – there’s no rush to buy everything at once.
Conclusion
Building an IRL livestream backpack is a rewarding project that empowers you to share experiences from anywhere with your audience. By using consumer-grade components and a bit of DIY ingenuity, you can replicate much of the functionality of expensive professional rigs at a fraction of the cost. In this guide, we walked through the essential components – from camera and connectivity to power and cooling – and provided guidance on assembling and optimizing the setup.
To recap some key points:
- Use what you have whenever possible, such as your existing smartphone, to keep initial costs low.
- Plan for reliability by incorporating at least two internet sources (if you can) via a bonding solution like a Raspberry Pi with Speedify, ensuring a steadier connection as you roam.
- Manage power and heat diligently, since a stream is only as good as the uptime of your gear – carry ample battery capacity and keep your devices cool.
- Stay organized with your backpack layout and cabling to make the streaming process smooth and professional.
- Test and iterate: Do trial runs and don’t be discouraged by hiccups. Each issue you solve makes your setup stronger.
- Know your vendors: Almost all components we discussed can be bought through U.S. retailers such as Amazon, Best Buy, B&H Photo, or even local electronics/computer stores. You don’t need specialized “broadcast” equipment to get started – consumer tech is powerful enough today.
- Engage and enjoy: Ultimately, the tech serves the content. Once your backpack is up and running, you can focus on the adventure and interaction, confident that your rig can support you.
As you go live from the streets, trails, or wherever your journey takes you, you’ll likely find a growing appreciation from viewers who get to experience those moments with you in real time. And you can take pride in having built the system enabling that connection. It’s a learning process, but one that pays off in unique, authentic streaming content.
Happy streaming, and see you out in the IRL world! Safe travels with your new backpack rig.